The Why, When, Where, and How of Building a Wood Duck Box
By PJ DelHomme
It’s winter, and you need a project. This is a great antidote to cabin fever, and the wood ducks will thank you for it.
Wood ducks are downright stunning to see in the wild, and they can use our help. They’re found across the eastern half of the U.S. down to the Gulf Coast, and a western population lives in southern British Columbia down to California.

Aside from their colorful plumage, they’re unique because they don’t nest on the ground. They are cavity nesters that rely on hollowed-out old-growth trees near water. When those trees aren’t available, hens are vulnerable to ground predators like raccoons and snakes. The nesting box you provide is a fortified sanctuary, offering a safe space for a hen to hatch her brood out of reach of hungry neighbors.
Building these duck condos is a great garage project to help beat the long winter nights, and the timing is perfect. While the wetlands are frozen, you can easily walk across the ice to install mounting posts in areas that would otherwise require a boat or waders. Plus, wood ducks are among the earliest migratory birds to return. They begin scouting for homes the moment the ice breaks in late winter. In other words, get this box built and installed by mid-March at the latest. So, what are you waiting for?
The Materials List
- Primary Lumber
One 1″ x 12″ x 10′ rough-cut cedar or cypress board. Seriously, that’s all you need.
Cedar naturally resists rot and insects without the need for chemical treatments that could harm the ducklings. Choose rough-cut wood as the texture helps the ducklings climb the interior walls. - Assembly Hardware
One small box of 2-inch galvanized or stainless steel deck screws. Standard nails will pull out over time as the wood swells and shrinks with the seasons, but deck screws provide a permanent, rust-proof grip.Two 2-inch brass hinges and a zinc hook-and-eye latch for the side-opening cleaning door. - Interior Elements
One roll of 1/4-inch wire mesh. This will be the interior “ladder” beneath the entrance hole. To secure this, use 1/2-inch heavy-duty staples. Finally, grab a large bag of unscented cedar shavings. Wood ducks do not carry their own nesting material, so you must provide a four-inch layer of bedding to cushion the eggs. - Mounting Supplies
To install the box, buy one 4″ x 4″ x 10′ pressure-treated post or metal fence post and a 36-inch galvanized metal cone (predator guard). The guard is non-negotiable; without it, the box often becomes an easy meal for climbing predators like raccoons or snakes.
The Cuts
Cut the back panel to 32 inches. This extra length creates the mounting tabs at the top and bottom. Next, cut the front panel to 24 inches. To keep predators out, be careful to cut a 3″ tall x 4″ wide oval entrance hole. On the inside of the front panel, about one inch from the base of the hole, staple a strip of wire mesh. This mesh is the ladder ducklings use to exit the box.
Cut two side panels at 24 inches each. For the left side, you will cut this piece into two parts: a 6-inch fixed upper section and an 18-inch hinged door. Then, cut the roof to 16 inches to ensure a deep overhang that shields the entrance from driving rain.
The remaining wood should be used for the floor; cut to 9 ¾ inches square. This will leave you with roughly 10 inches of scrap wood, which can be used to create a “predator block”—an extra-thick piece of wood screwed under the entrance hole to make it harder for raccoons to reach their arms inside. Or, you can skip the predator block and turn it into cedar shavings.
Before assembly, drill five small ventilation holes in the side and back panels, positioned about one inch below the roofline. Angle the drill slightly upward from the outside so the holes cant inward, allowing hot air to escape while preventing rain from entering. Without ventilation, heat buildup inside a sun-warmed box can be lethal to eggs and young ducklings.

Assembly
Start by constructing the main frame: attach the back panel to one of the fixed side panels using four screws. Drill pilot holes slightly smaller than the screw diameter before fastening to prevent splitting.
Prepare the floor panel by drilling five ½-inch drainage holes—one in each corner and one in the center. Install the floor recessed at least ¼- to ½-inch from the bottom edges of the side panels to prevent moisture from wicking up into the nesting material. Secure the floor by driving screws through both the back panel and the first side panel.
Once the base is solid, attach the completed front panel to the frame using six screws. The remaining side panel serves as the swinging cleanout door. Hang it at the top using your two brass hinges, then pin it shut at the bottom with the hook-and-eye latch. Finally, attach the roof with a generous overhang at the front to shield the entrance. Be careful not to screw into the door panel so it remains fully functional for annual cleaning.
Once assembly is complete, fill the box with four inches of unscented cedar shavings before mounting. This depth is important: too little insulation leaves eggs exposed, but keep in mind that if the shavings are piled too deep, the sitting hen rides too high in the box and can be reached by a raccoon through the entrance hole. Four inches hits the right balance.

Box Placement
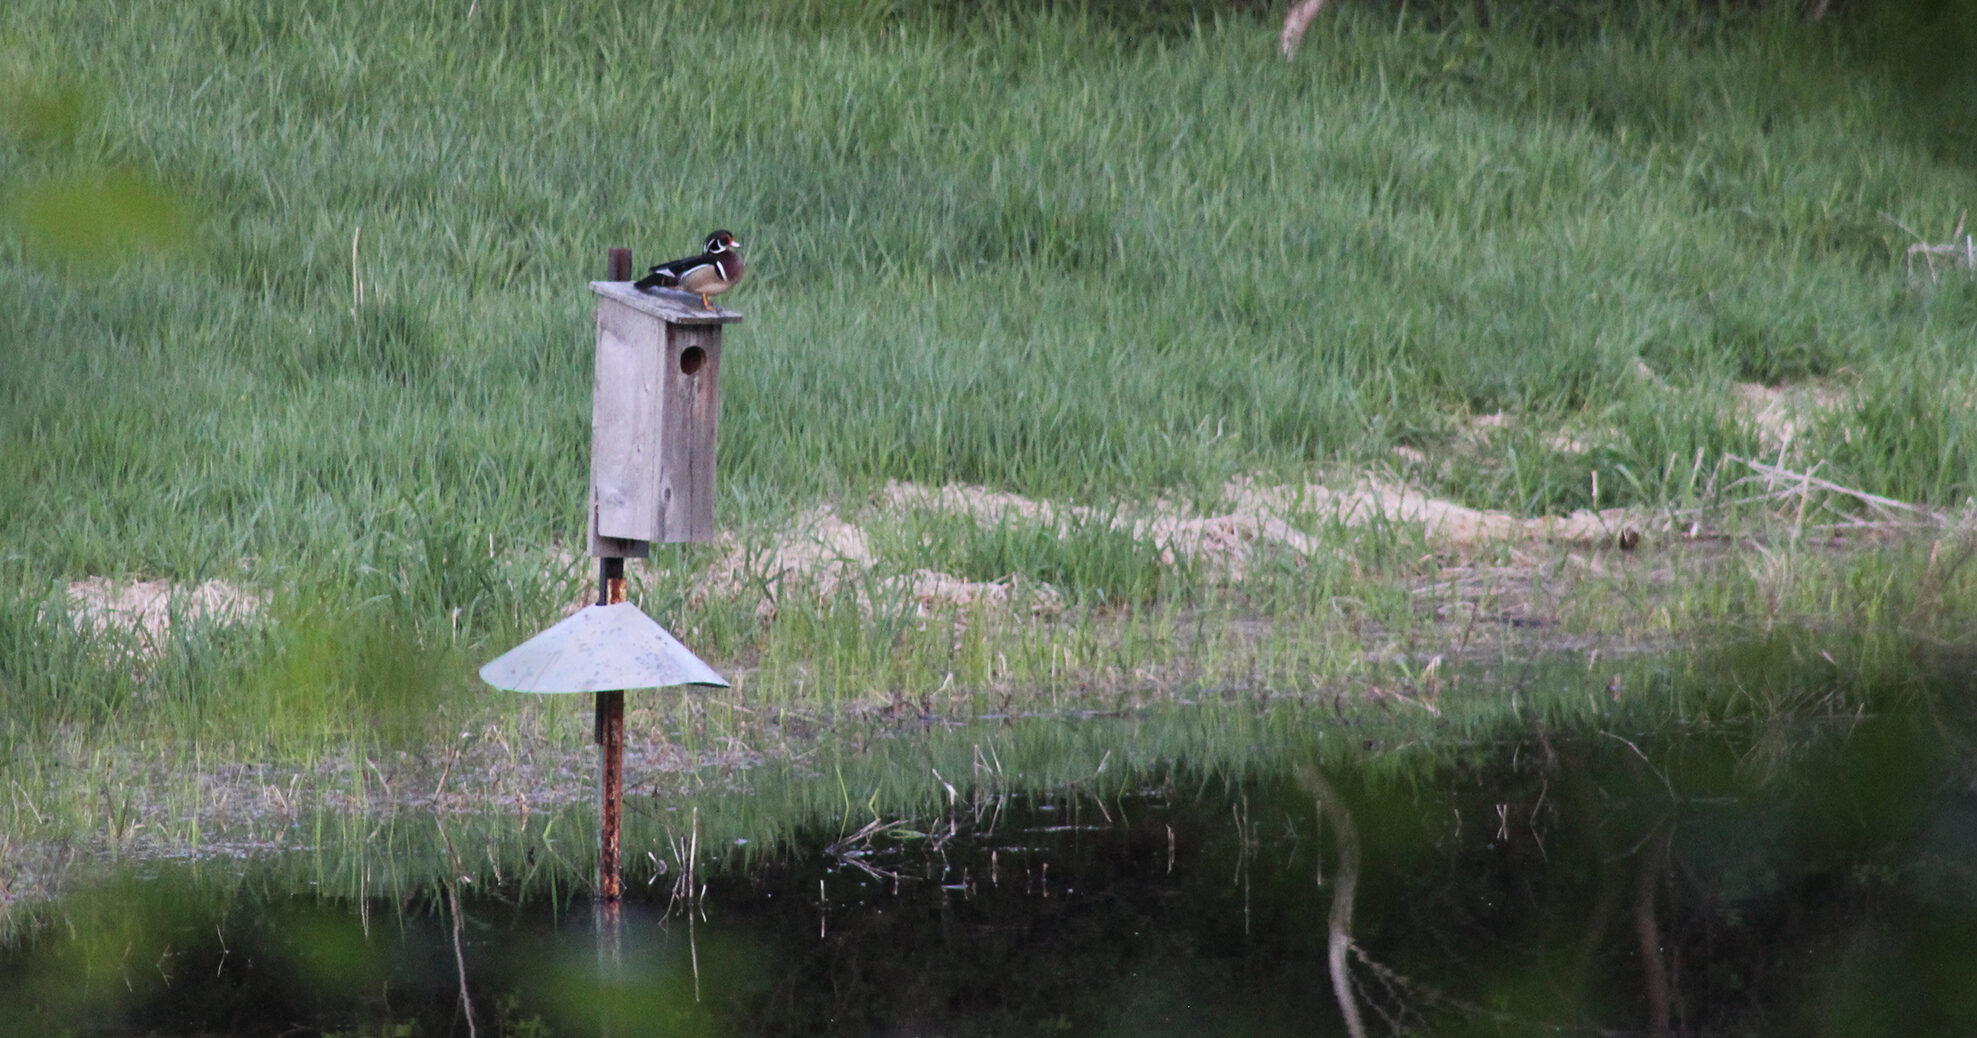
Convincing a duck to move into your homemade home depends on where you plant the post. Place the box near open water but within a short distance of shoreline cover like reeds or fallen logs to give ducklings a place to hide immediately after their first leap from the nest. Mount the box six to ten feet above the water line, ideally facing east or south to capture the warmth of the morning sun. Most importantly, avoid placing it under overhanging branches, as these provide a literal bridge for squirrels and predators to bypass the safety of the box.
Before securing the box to the post, slide the galvanized predator cone onto the post and position it several feet below the box—high enough that a raccoon cannot reach past it, but not so close to the box that a determined animal could jump from the cone to the entrance. The cone must flare downward and outward. Tighten it firmly; a loose guard is easy for a raccoon to spin or collapse.
Annual Maintenance
A wood duck box is not a set-it-and-forget-it project. You should inspect and clean it out annually a month or two before nesting season each year. January and February are ideal in most of the ducks’ range. During your annual inspection, remove all old nesting material, including shavings, eggshell fragments, down feathers, and debris. Old material can harbor parasites and disease. Replace with 3 to 4 inches of fresh, coarse wood shavings. Also, look inside and around the box for wasp nests, which can deter or displace nesting hens.
Over time, a well-maintained box can host generation after generation of wood ducks, making it one of the most rewarding conservation projects a hunter or wildlife enthusiast can take on. Plus, it gives you a constructive reason to hang out in the garage or wood shop when the kids want to watch The Lion King for the 45th time.
PJ DelHomme writes and edits content in western Montana. He runs Crazy Canyon Media and Crazy Canyon Journal.