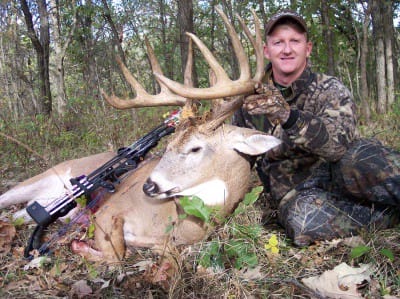
One summer Jay Gregory, host of The Wild Outdoors on the Outdoor Channel, glassed a huge whitetail in a bean field and thought, “Man, that dude will push 200 inches!” He hooked some Cuddeback cameras on trees in a thick, marshy spot near the field where he thought the buck might be bedding. Over the next couple of months he got five photos of the animal—not a lot, but enough. The image time-stamped 9:00 a.m. on Oct. 24 showed the monster at the waterhole in broad daylight. Jay moved in with a tree stand and a week later he arrowed the beast – 7 ½ years old and 198 inches!
It’s a killer three-pronged strategy: Glass and find a few big bucks… set out a few trail cameras nearby to further nail their movements… and then the fun part, slip in and shoot one of the beasts when bow or gun season opens.
Glassing Tips
On evenings in late summer and early fall, bucks and does come to alfalfa, bean and even cut hay fields to feed and mingle an hour before dark. No fields in your area? No sweat, look for deer popping out into power line rights-of-way, cutovers and other openings in the timber.
Set up high and a good ways off so you don’t spook them. With binoculars and a maybe a spotting scope, begin your recon. Look the bucks over and focus on a big boy or two you’d love to hang on your wall. Then get down to business. Glass the surrounding woods and brush for the exact corners, edges or points where the most bucks come and go. Then move in with your cams.
Camera Tips
Sneak 60 to 100 yards back into a piece of timber where you have seen bucks coming and going. Hang a cam on a well-used deer trail that cut the area. Little ridge points, dips and bottlenecks of thick cover in the direction of where you think they are bedding are also good spots for secondary cams. You can get by with one or two cameras, but three or four are better for covering most of a buck’s core living area.
Remember how and where Jay Gregory shot that 200-class monster I told you about earlier? “Once you spot an old buck in a field, sneak in and set your cameras on trails in a nearby riverbed or creek bottom,” he says. “As summer deepens, mature bucks spend a lot of time hanging out near water in low-lying areas. If you get lucky and set your cams in the right spot, you can find out exactly where he’s bedding like I did.”

Great tip, and here are some others:
- Buy two memory cards for each of your cameras. Each card will hold many hundreds of images, so you don’t have to make too many trips into a camera site to switch them out. The less your human intrusion, the better chance your target buck will stay on pattern.
- I find that deer are more apt to react negatively to a white flash than the red flash of an infrared camera, so I recommend the latter.
- Hang cams at midday when deer are largely inactive. Be quiet. Wear rubber gloves and wipe camera boxes with an odor-eliminator.
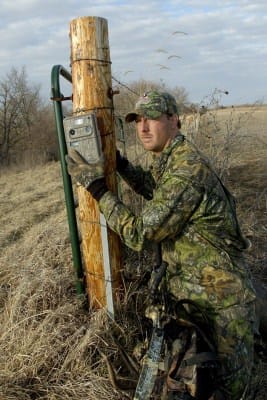
- Strap a cam to a tree or fence post, level and 24 to 30 inches off the ground; set it within 9 to 15 feet of a trail, creek crossing, etc.
- Don’t point a cam up or down a trail or even full perpendicular to it. Angle a cam 45 degrees onto a trail where a buck will walk head-on into the photo frame.
- If you get a lot of doe pictures but few bucks and not your target shooter, move your cams to nearby trails. If there are four or five trails coming to a food source, a big buck might walk on only one or two of them. Move your units once a week until you find him.
Some bucks are photogenic, and you might get 10, 20 or more shots of them. Other animals are like ghosts and might pop up on a cam only once or twice. But one good image is all you need, especially if it shows him moving in daylight in a good spot to hunt. A day or two after you get that picture, move in with a tree stand or blind and try to get him. There’s a good chance you will, good luck!
Check out Hanback’s BIG DEER blog (www.mikehanback.com) for more tips and tactics.


