If you are an avid bowhunter, at one time or another you have probably been dissatisfied with fletched arrows you purchased from a store. Maybe the fletching fell off within the first week of shooting or the insert pulled out when you gave the arrow a tug to get it out of the target. The good news is building arrows isn’t like building a skyscraper. With the right tools and a little knowledge, you can custom build arrows that you or anyone you build them for will be proud to shoot.
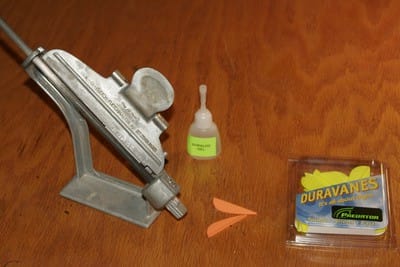
To build quality arrows, you need the right tools. There are a variety of tools you will need to do the job right. First and foremost, you will need a high-quality arrow cutoff saw. Apple Archery, Cabela’s and others make great saws. The Apple Archery Pro cutoff saw has a ball-bearing motor that hums at a whopping 8,000 RPM, producing a quick clean cut every time you cut an arrow shaft. If you don’t have lots of money, there are a few other cutoff saws on the market that cost less. An arrow spin tester is pretty handy for spin testing the arrows after they are built. Other required parts and tools include a fletching jig, glue, inserts, fletching, plastic vanes or feathers and nocks.
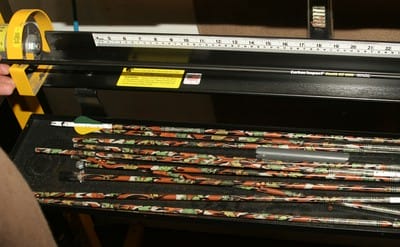
The first step is cutting the arrows to the correct length. Most shooters prefer to have an inch or two hanging over the end of an arrow rest. Arrow saws come with an installed measuring tape on the saw, which makes cutting them to length simple and quick. If you are cutting an economical shaft –one that has straightness tolerances of .005 or .006—you may want to consider cutting the shaft at both ends. Most variances in straightness in a shaft occur at the ends of the shaft. By taking a little off both ends, you end up with a straighter shaft.
After your arrow is cut to length, it is time to insert your nocks in the end of the arrow. Some nocks need to be glued in. Some arrow shafts come with them already installed. Many companies are offering high speed nocks that simply push into place and promise to increase arrow speed. Most push-in nocks hold up extremely well and can be rotated once installed, giving the shooter the ability to rotate the direction the #### feather is facing when they shoot the arrow. If a snap-in nock comes loose, it can be pushed back into place. The next step is gluing the fletching onto the arrow. Make sure the shaft is clean before you glue on the fletching. Applying an arrow cleaner to the shaft to eliminate all residue on the shaft before gluing on fletching is a good idea. Failure to do this could reduce the longevity of the bond between the shaft and the vane.
There are several fletching jigs on the market from single arrow jigs to jigs that fletch up to six arrows at a time. Fletching one arrow at a time is easier and less stressful if you haven’t fletched arrows before. Before you put the first fletch on, determine if you want your vanes to be straight or offset (helical). Many bowhunters choose to have their fletching offset because it steers arrows tipped with broadheads better than straight fletching. There are three options: straight, right helical, and left helical.

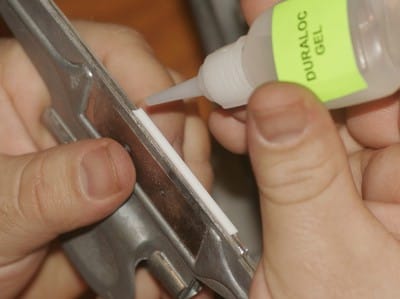
Most jigs come with a clamp that the fletching is placed in. The clamp that holds the fletching is applied to the arrow and the jig until the glue dries. Some jigs allow you to fletch an entire shaft at once, others allow one fletch to be applied at a time. Place your vane in the clamp so the rear of the vane will be between ½ and ¾ of an inch in front of the nock and then apply glue to the vane and gently set the clamp onto the arrow shaft. The key to success when gluing on fletching is using enough glue so the fletching will stay on for a long time but not so much so that you will have gobs of glue on your arrow. After your first vane is dry, rotate the arrow in the jig and repeat the process with the next vane.

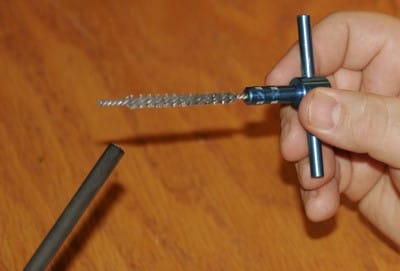
Once all of your fletching is glued on, it’s time to glue in your insert. Use your prep tool to rough up the inside of the shaft. Roughing up the shaft will cause the glue to bond to the shaft with greater strength. Next, put glue on the insert and glue it in.

Before the glue dries, screw a broadhead into the insert and line up the vanes with the broadhead blades and let the insert dry in place. Having the vanes and broadheads aligned properly will result in a more accurate-flying arrow. Now the arrow is ready for the woods.
The nice thing about fletching your own arrows is the arrows can be customized any way you want to. I prefer Predator Vanes by Duravanes and Steel Force glue; you might like different brands. It pays to try different things to find out if one works better than another.


