By M.D. Johnson
The summer months, despite the nice weather across much of the nation, can be a frustrating time for the outdoors enthusiast.

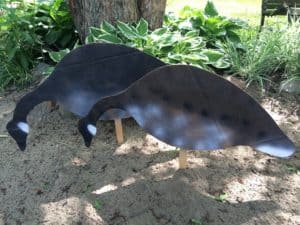
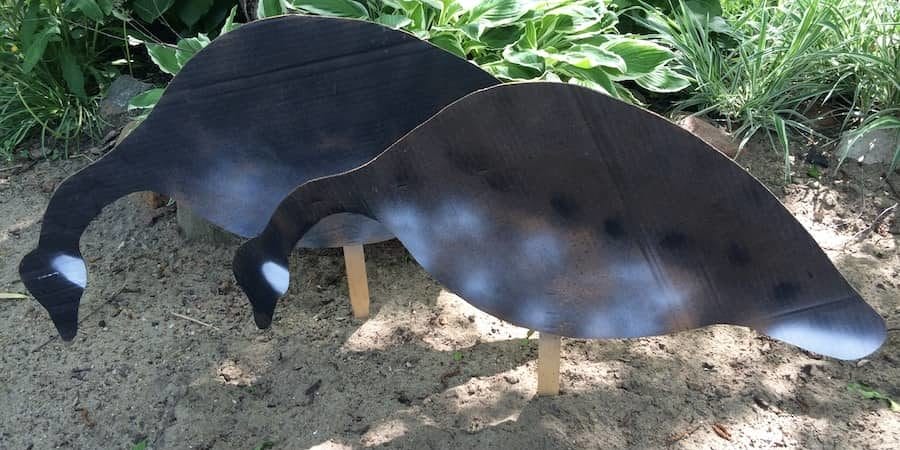
Make your own goose silhouette decoys from cardboard boxes and spray paint. They’re inexpensive and work great in the field.
Oh, sure, there’s plenty of things to do around the house, like mow the lawn, paint the garage, and pick up after those two black lab dogs…and I’m sure you dog owners know what I’m talking about there, eh? But full To-Do lists aside, summer still can prove a challenge. Fishing’s tough due to the warm water temperatures, and hunting season is still a couple very long months away.
Summer doesn’t have to be passed simply with mowing, painting, and shoveling. In fact, there are plenty of projects for sportsmen that result in items that will prove quite handy. Try these DIY summer projects.
Silhouette Goose Decoys
Years ago, my wife Julie and I drove from our home in Iowa to visit my folks in northeast Ohio, and, as it was late November, do a little rabbit hunting with my Pop. Come first day, though, the focus on bunnies switched, thanks to cold weather, snow, and a constant stream of hungry honkers, into a goose pursuit. The problem? We had no decoys. We hadn’t even thought of loading up the plastics. However, with kudos to Julie’s artistic talents, some thrown-out cardboard, a handful of wood slats, and four rattle cans of paint, we were in business.
To make 12 silhouette decoys, you will need the following items:
• Eight (8) cardboard boxes, flattened, approximately 36-inch square. One box makes two decoys.
• Sixteen (16) 12-inch wood paint stirrer sticks.
• Four (4) spray cans flat or matte paint—light grey, white, black, brown.
• Office stapler
• Utility knife
• Pencil
Step 1 – After asking permission, we rooted through the trash bin behind the local pharmacy and came up with eight cardboard boxes which, when flattened, were about 36 inches square. Slit the boxes at each end, which leaves you with two flat single-thickness squares per box
Step 2 – On three single squares, draw the outline of a Canada goose in various body postures including a sentry, feeder, and outstretched neck feeder. Carefully cut along the lines and separate your new decoys from scrap cardboard. Scrap will be used as a stencil for additional decoys.
Step 3 – Using the stencils, sketch outlines on the remaining single-thickness squares of cardboard. Cut carefully.
Step 4 – With the stapler, securely attach the wood paint stir sticks, which are your decoy legs, to the bottom of each decoy. Apply your best knowledge as to where legs would be located depending on the body style of the decoy. Here’s a tip: Stir sticks can also be used to reinforce the upright neck section of any alert sentry decoys. We got ours gratis from the neighborhood hardware store.
Step 5 – Using your spray cans, it’s time to paint your decoys. Heads and necks are black, chests are grey blending into white from belly to tail, and backs are black with a mist of brown. Don’t forget to paint the legs black. A small stencil cut from scrap cardboard can be used for the white chinstrap.
Make Your Own Trotline for Catfish
Fishing by means of a trotline isn’t anything new, nor is it complicated. A trotline is a single line holding multiple baited hooks.

Running trotlines is great fun and very productive for filling the freezer with tasty catfish. Making your own trotlines will save money and makes for a great summer project.
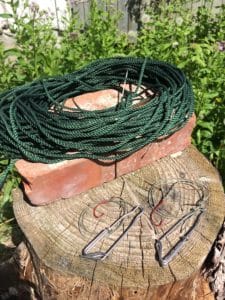
What a trot line can be is incredibly effective, particularly during the summer when catfish are concentrated under schools of gizzard shad or other baitfish. Here are all the ingredients for a killer trotline set-up.
To make a trotline, you will need the following items:
• For the main line, 200 to 250 feet of No. 36 (400-lb. test) tarred/braided nylon cord. One-pound (550-foot) roll makes two lines (barlowstackle.com; $26).
• Dropper lines are made from a 400-foot roll of No. 12 (95-lb. test) braided nylon cord (barlowstackle.com; $9). I cut 20-inch droppers, and like my droppers to be a different color from my main line.
• Three-inch stainless steel halibut clips, which are also called gang rig clips (cabelas.com; $10/25).
• Barrel snap swivels, size 2/0 (fishusa.com; $1/2).
• No. 1 Daiichi Bleeding Bait Octopus wide-gap kooks (ttiblakemore.com; $3/11).
• Bait of choice. I prefer nightcrawlers, cull (bait) shrimp, chicken liver, and cut shad.
• Smelly Jelly Sticky Liquid, Shad or Garlic (tacklewarehouse.com; $6/4 ounces).
• Plastic electric drop-cord reel for winding main lines, optional (menards.com; $7).
• Anchor for end of main line. A 5-lb. window weight or 3-lb. grapple anchor works well.
• Brass dog leash clip for attaching mainline to anchor weight.
For our purposes, we’ll build a 150-foot trotline with 20 20-inch droppers. Individual lines can be shortened or lengthened, depending on specific situations or state regulations.
Step 1 – Be sure to read and understand the trotlining regulations in your state. For example, Iowa limits properly licensed anglers to a maximum of five trotlines carrying a total of no more than 15 hooks. Some states regulate the overall length of the main line, hook spacing, tagging requirements, and where the lines may or may not be set.
Step 2 – Cut 150 feet of No. 36 twine as the main line, leaving 25 feet at either end to attach the line to the bank and to attach an anchor. Melt the ends of the main line with a lighter or propane torch to prevent unraveling. Securely knot the brass dog leash clip to one end, and wind the line onto the cord reel.
Step 3 – Slip the barrel snap swivels onto the gang rig clips; a little needle-nose plier work may be involved. Prepare the 20-inch droppers with a No. 1 hook at one end, and a closed loop at the other. Clip the barrel snap swivel onto the dropper loop.
Step 4 – At your trotline fishing location, tie off the end of the main line to a suitable tree or sturdy overhanging branch. Back off 25 feet, and clip a baited dropper onto the main line. Continue to clip droppers at roughly 5-foot intervals. With the last dropper clipped, run approximately 25 feet of free main line, snap the anchor onto the brass clip, and lower to the bottom.
Make Waterfowl Call Lanyards
Waterfowl call lanyards have a definite purpose above and beyond helping you look trendy in the field. A good hanger keeps calls handy, organized, and at least partially protected from the muck and mire we waterfowlers face on a regular basis. Too, a lanyard is good insurance. No one wants to drop a $200 goose call or $60 duck call in 8 feet of water and swamp mud. And while commercially fashioned lanyards are available, you can easily make your own piece for less than a $10 bill and in the colors, width, and length that best suit your needs.
The time required to build a lanyard is approximately two hours. Your cost, excluding calls is just $7.
The material needed is 100 feet of military spec 550 Paracord (parachute cord), No. 400 tensile strength; supplycaptain.com; (845) 236-1110.
To braid the body of your lanyard, cut a length of paracord twice as long as the intended finished length of your lanyard. Double it over (loop, up; tag ends, down), and hang from a sturdy nail. This is the core. The remaining paracord (approximately 90 feet) is likewise doubled in half, with the tag ends coiled and secured with rubber bands. Beginning 4 to 6 inches below the nail/loop, start by attaching the knotting cord to the core with a square knot. Continue tying square knots until the desired length is reached.
Now it’s time to finishing the lanyard and droppers. When the desired length is reached, double the lanyard over, matching the first and last knots. Join the initial loop with the remaining core, and tie four to six additional square knots; pull very tight. To finish, combine all cords and secure with a barrel knot. Tied with slipknots, the four remaining tag ends become the droppers that hold the calls. Melt the raw ends of the cord with a lighter to prevent fraying.
These are just a few productive summer projects for sportsmen. Find others, and share your favorites here.
The Union Sportsmen’s Alliance website is designed to provide valuable articles about hunting, fishing and conservation for members of AFL-CIO affiliated labor unions and all sportsmen and sportswomen who appreciate hunting and fishing and want to preserve our outdoor heritage for future generations. If you would like your own story and experience from the outdoors to be considered for our website, please email us at [email protected].


