 When you walked into my grandparents’ home, the first thing you noticed was a crappie on the wall. This, my grandfather reminded us grandkids often, wasn’t just any fish.
“That there,” he always said, “is a Berlin Lake black crappie. It measured 19 1/2 inches.”
Sure, we had heard the story before, but it didn’t matter. It was Grandpa’s story, and that was Grandpa’s fish.
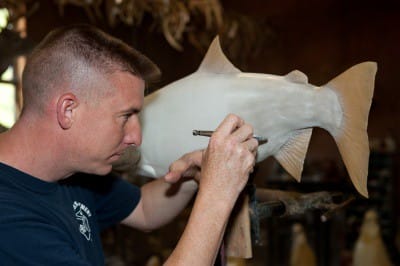
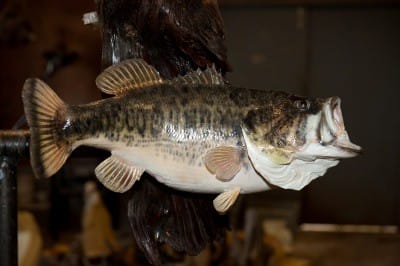
Not only was it a tremendous crappie, but the taxidermy work-work done by my Uncle Jim-was of the highest quality. Jim was an artist and his tools were an airbrush, a scalpel, paints, steady hands, and incredible patience. He, like all talented taxidermists, welcomed the challenge of transforming the lifeless into ever-lasting re-creations. “I want it to look as if it were going to swim off the wall,” he said often. And his art did appear as if they were one tail-flick away from being the one that got away.
But what are the steps in this transformation process? A taxidermist for more than a decade now, Floridian Eric Blount is a graduate of Iowa’s noted Kindred Spirits School of Taxidermy.
“I’ve always been an outdoorsman,” said Blount. “And I’ve always been intrigued with Mother Nature, so taxidermy seemed a natural thing.”
Eager to talk about his art, Blount offered these suggestions for those thinking about hanging that next lunker on the wall, as well as insight into what might best be called Taxidermy 101.
Q – This fish is huge! You know it’s destined for the wall, so what’s you’re first move even before it’s out of the water? Won’t a net damage your prize?
A – That’s a tough question. Yes, a net could cause some damage to the fins; however, no net, and you stand the chance of losing your fish. Typically speaking, a net isn’t going to damage a fish to the point a taxidermist can’t repair, if it does anything at all.

Q – It’s in the boat, but you want to practice catch-and-release and go with a reproduction mount. What’s next?
A – Ideally, you’re going to take reference photos from several angles. Get the eyes, mouth, and fins in great detail, and note any oddities or unusual features. Next, take good accurate measurements, including length and girth. The most important thing, though, are those reference photos.
Q – No reproduction for me! I’ve decided I want a traditional skin mount, so what do I do?
A – If I had a shotgun (Blount laughs), I’d shoot it. Just kidding. I wouldn’t suggest clubbing it or damaging it in any way. Don’t put it on a stringer or in a fish basket, either. Put it on ice, perhaps wrapped and protected in a damp towel, in a cooler. Try to keep it flat and straight. Common sense care, really.
Q – Now it’s into the freezer. Is there anything I should know here?
A – Wrap the fish in damp, not wet, paper towel, being careful with the fins, and seal it tightly with heavy plastic wrap before putting it into a big Ziplock or garbage bag. Try to get all the air out; you don’t want to contribute to freezer burn. And get it to your taxidermist as soon as you can. Oh, and still frozen, not thawed.
Q – You’ve researched local taxidermists, and have reviewed their work, credentials, and references on-line. You’ve contacted the one of choice, and made appointment. Now you’re there at the studio. What’s step one?
A – Here, the taxidermist will inspect the fish, note any damage, and choose what he believes is the best side. Then, together, you’ll decide on a pose and a mounting surface, be it a plaque, driftwood, or a reproduction of natural habitat.

Q – The actual mounting process then begins, yes?
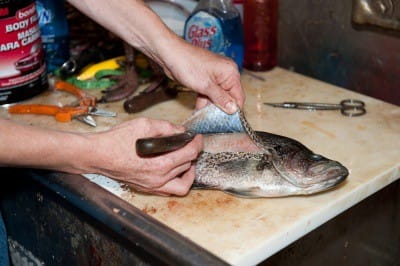
A – Yes. The first thing I’ll do is choose a form based on the size of the fish. The fish is then carefully skinned and tanned. Many artists use a preservative on the skin; personally, I tan all my fish. It takes a bit longer, and every species is different, but I believe the finished mount looks better.
Q – With the skin prepared, what’s the next step?
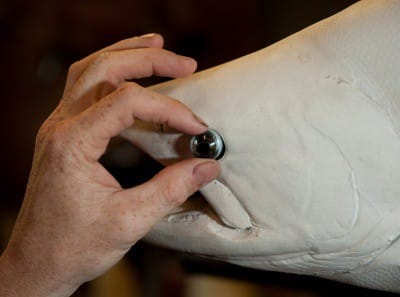
A – Next, I position the skin on the form, and essentially reassemble the original fish. Now’s when I set the mouth, separate the gills, close the wall-side incision, and support or ‘card’ the fins so they’ll dry the way I want them. Then I’ll set the eyes.
Q – Once the mount has been assembled and given time to set, is it correct to assume that paint is right around the corner?
A – That’s correct. I have an extensive reference library here. However, it’s fantastic when my client can provide reference photos of that particular fish. After the proper colors and patterns are applied, the mount then gets several layers of automotive clear coat, both for protection and as a way to impart a more natural ‘slimier’ look.

Q – And finally, care?
A – A quality fish mount shouldn’t need anything more than an occasional feather dusting. As for damages – maybe a fin gets chipped or broken – any capable taxidermist should be able to repair minor damages quickly and easily.
Contact: blounttaxidermy.com; 941-725-1591; [email protected]


