By Beau Tallent
No organic meat is more natural and healthy than wild game. A single deer will provide a tasty centerpiece for countless meals.

Ground venison can become a standard for the family menu of a deer hunter. An investment in a quality grinder will allow a hunter to put up and freeze 10 to 15 pounds of ground venison from an average white-tailed deer once other standard cuts like loins and roasts are taken.
Farm-to-table appears to be a food movement with some legs. Consumers can’t get enough locally grown, pesticide-free, non-GMO fruits and vegetables. They also want organic meat, which tempts the modern foodie with health-centric terms such as “free range” and “grass fed.” Meanwhile, popular diets harken back to the caveman days when humans ate only what they killed, and fruits and nuts were picked from their natural surroundings.
Isn’t it great to be a hunter? Hunters were rocking the Paleo diet long before the Dr. Oz Show convinced suburban parents they should feed their families organic meat.
Sportsmen have long valued the simple yet profound concept of being personally responsible for putting up our own meat. Hunters take ownership in killing the animal, we field dress the carcass, and with most small game animals, hunters also process the meat for the freezer or prepare it for a fresh meal. Big game animals like deer are often taken to a commercial processor, either out of convenience or because hunters feel they don’t have the expertise or means to process the deer themselves. That is changing, thanks in large part to the information age where anyone can learn just about anything from quality research on the Internet. This includes learning how to process your own deer. Online videos, articles and message boards where hunters can ask specific questions make it easy for anyone to tackle their own deer processing.
Books have been written on have to field dress a deer and process your own venison. We won’t attempt a how-to, step-by-step guide here. Instead, we will cover some important yet often overlooked aspects of getting your venison from field to table.
Gear Up For Self-Processing
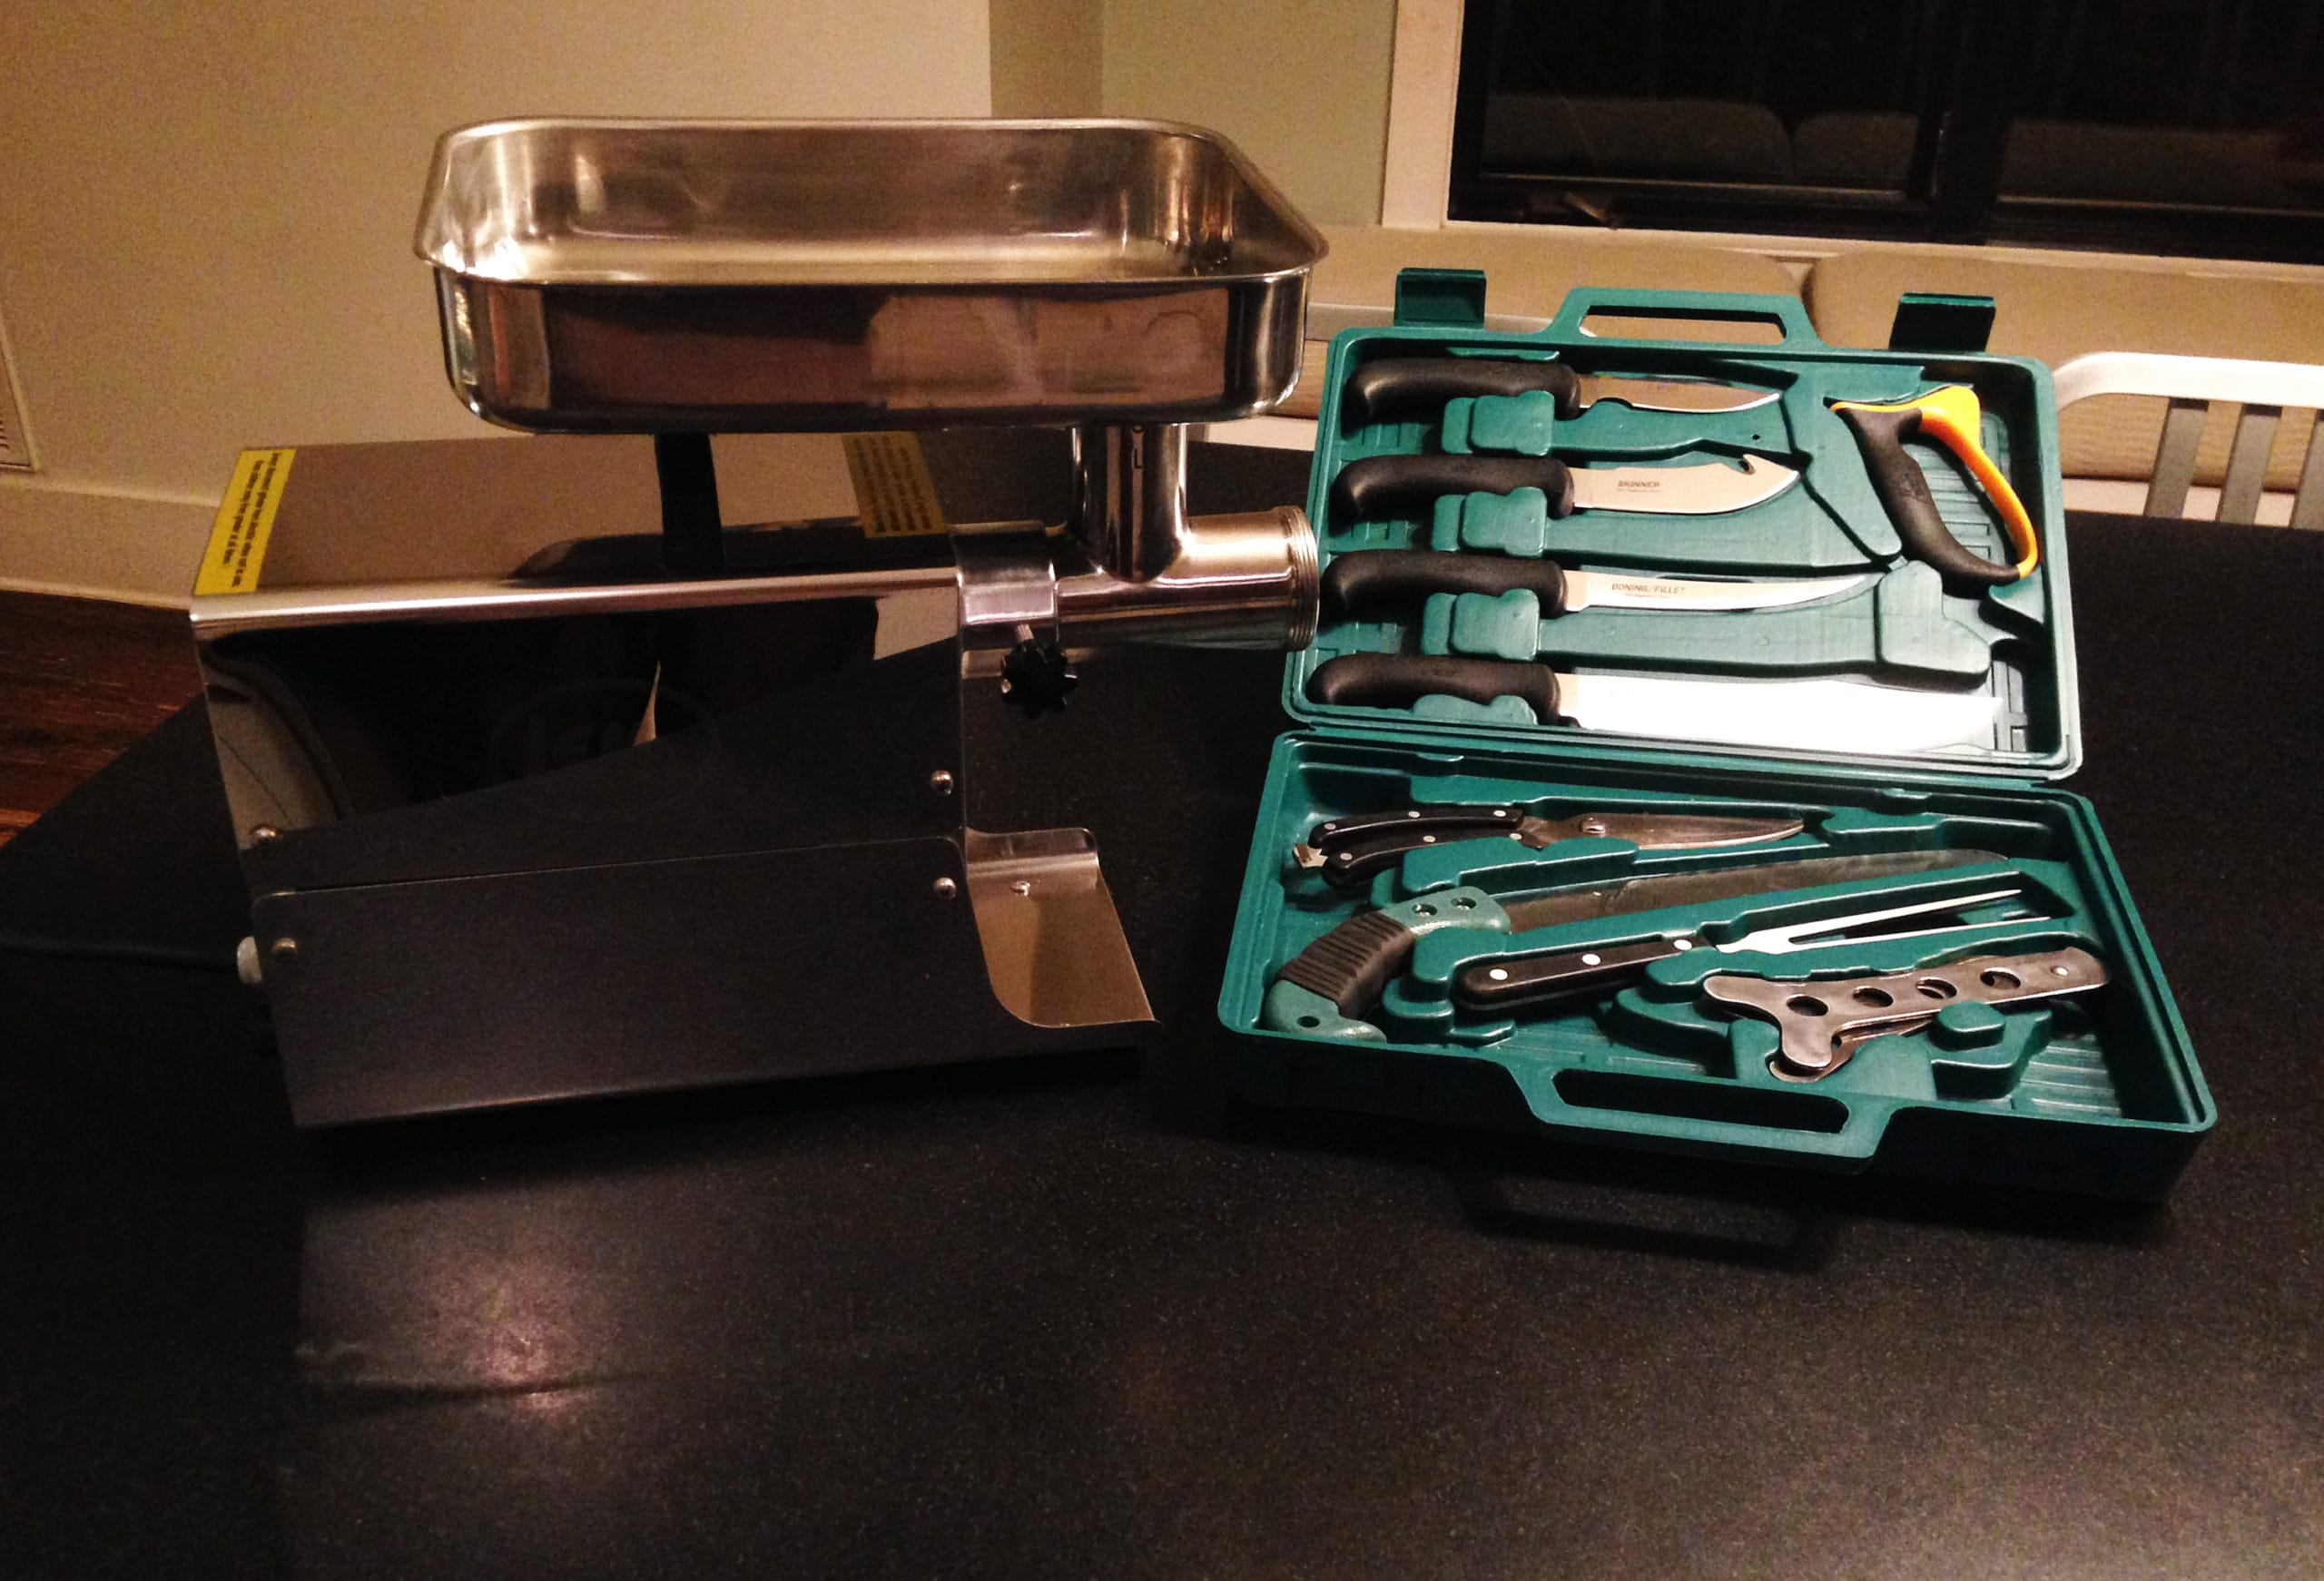
Don’t let a lack of equipment keep you from taking the self-processing leap. You can literally get by with nothing more than a skinning knife and another good blade for boning out your cuts of meat. However, there are items will make your job much easier.
First, have a cleaning and processing station ready to use that includes a decent gambrel to hoist and hang your deer. My workstation is in the backyard where I use a gambrel pulley rope slung over a tree. The backyard is convenient because I have easy access to water, and a garbage can lined with a trash bag. I set up a plastic table and use my pickup tailgate as addition workspace, and my kids are within yelling distance to come assist.
My family eats a lot of ground venison, so we need a meat grinder. I use the smallest LEM Big Bite Grinder made, the #5 .25 hp model. A larger grinder would certainly be a luxury that would make the work go more quickly, but the .25 hp grinder works fine for us. I like to debone a good bit of a deer, and running that meat through the grinder is the last step in processing a deer. It’s takes several hours as I run the meat through twice, stopping often to clean sinew from the grinding plates and gears. But it’s done in the living room, usually with a fire burning, a football game on TV, and with a sense of pride and satisfaction only a hunter filling his or her own freezer can know.

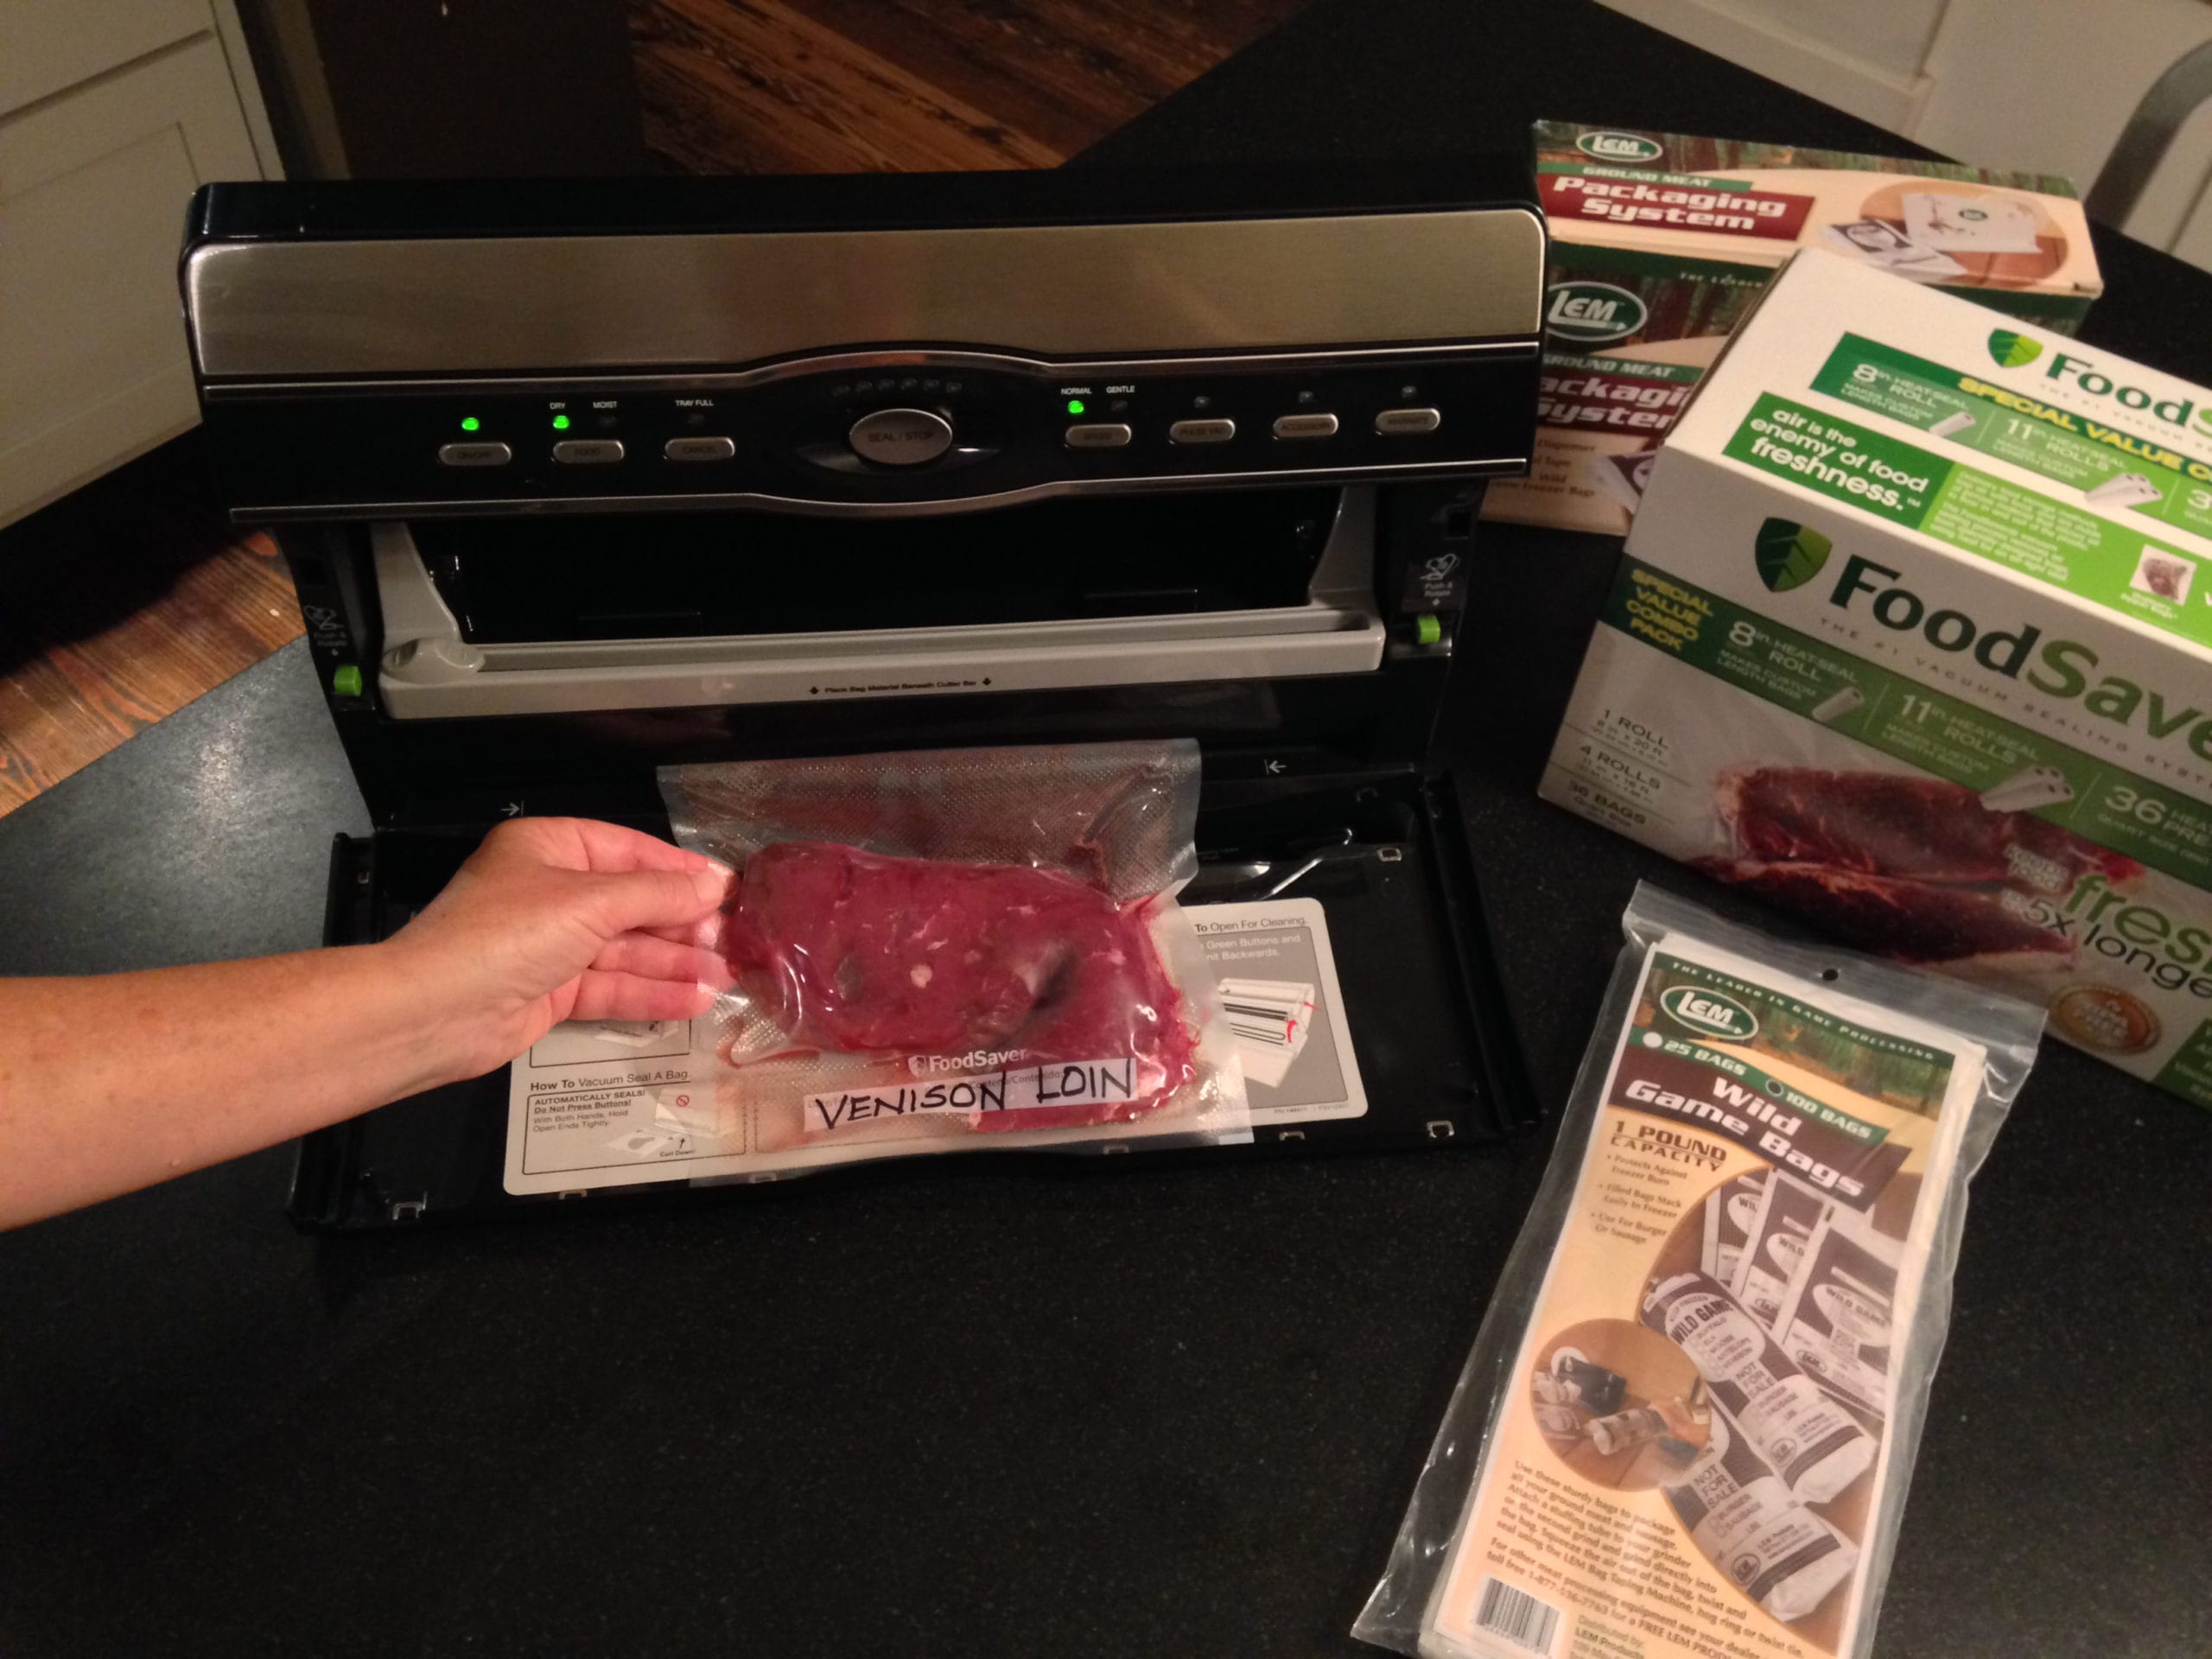
A vacuum-seal, food-packaging device makes self-processing a deer easier. It prevents freezer burn, and cuts of meat like a delicious venison loin are quickly sealed, marked and dated.
The third item I recommend is a vacuum-seal, food-packaging device. It prevents freezer burn, and we can seal and put up cuts of meat quickly that are marked and dated. We purchased ours for processing deer and other wild game, but we now use it for lots of other situations when we want to save and freeze food.
Plan For Success
Hunters are great at going the extra mile when it comes to hunt prep, from showers with scent-free soap to yearlong scouting. When you’re hunting for meat that you intend to process yourself, planning for after the hunt is even more important than all the planning that goes into a successful hunt. Make sure the knives are sharp, the gambrel is ready to use, and that you have plenty of vacuum-seal bags.
Make sure you have a plan to age your deer. The venison will have a better taste. I’m blessed to have a buddy with a personal walk-in cooler made from the refrigerated part of an old food truck. I like to hang my deer at least a week. When I have a day set aside for processing, I get everything ready, and then simply go pick up my deer from the cooler, hoist it on the gambrel, and get to work. A commercial cooler will work, but expect to pay a daily fee to hang your deer.
If I didn’t have a buddy with a walk-in cooler, I would skin the deer, quarter it, and ice the quartered sections in coolers until I have a day to process the meat. Plan to drain the coolers daily and change the ice, which in addition to aging the deer will remove almost all of the blood. Your already tasty venison will be even more delicious, and if you have a family member who thinks venison tastes gamey, this will help.
Shoot The Right Deer
Some deer taste better, and it’s not the old gray-faced doe or giant buck. There are tough times in the woods when hunters need to jump at the first opportunity to harvest a deer. However, it you’re watching a green field with several potential targets, pick the younger deer and your taste buds will thank you later.
Have An Exit Plan
Sure, that cavernous draw that requires rappelling gear to access might harbor the biggest buck you’ll ever see. I’ll never forget what a professional elk outfitter once said about a plan I concocted to kill a nice bull that had found a safe haven on a tabletop plateau surrounded by steep rock walls. “Take a knife and fork,” he said. It was his way of saying; you might get your bull, but we’ll never get the meat out and processed quickly enough before it spoils. Don’t shoot a deer you can’t field-dress and get out of the woods quickly to begin the cooling process, either with ice bags in the cavity, by hanging in a walk-in cooler, or by skinning, quartering and icing in coolers.
Processing your own deer is easier than ever with the wealth of how-to information available on the Internet. There is great satisfaction is knowing exactly how your meat was acquired and handled at every step—from selecting to pull the trigger, to proper field dressing, to processing and packaging.
Field Dressing And Skinning Tips
Field dressing is not difficult, but it can be messy, especially if you’re not careful or rush through the job. Here’s are some tips:
- If you’re actually field dressing your deer in the field, as the name implies, position the deer on its back, take a deep breath, and resolve to take your time. Even being very patient, unzipping a deer and removing the entrails and internal parts shouldn’t take 10 minutes.
- The first cut up the deer’s belly must be done carefully so your knife doesn’t puncture the stomach and intestines, which will be pushing out toward your blade at every opportunity. Use your fingers to guide the knife and keep the blade away from the stomach and intestines. Keep the knife at a low angle to cut only deep enough to slice through the skin and first layer of cartilage-like lining that holds in the guts.
- If you hang your deer on a gambrel for field-dressing, hang it by the rack if it’s a buck or by the neck if it’s a doe. Hanging head first, the stomach cut will allow gravity to pull the insides out so they fall into a gut bucket on the ground below. You can easily cut away at the linings so everything comes out neatly.
- Don’t forget the windpipe. Carefully reach as far up the cavity into the neck as possible with your knife and cut the windpipe, pulling it and attached organs from the deer. You’ll have to cut the windpipe by feel, so be careful of your fingers.
- Hang the deer by the back legs for skinning. Make incisions on each leg to the abdomen. Peel the hide away from the legs, and use your knife to begin separating the hide from the carcass. Once you get a good opening, continue peeling away the hide while your other hand lightly slices through the connective tissue between the hide and the carcass. Gravity will help toward the end of the process. Keep your knife clean of deer hair! Hacking away through the hair when skinning a deer will leave your meat a hairy mess.
Recipes:
CHEF TED LAHEY: Executive Chef of Table and Main and Osteria Mattone in Atlanta
Bio: Ted Lahey incorporates fresh local ingredients sourced from nearby Georgia farms, artisan bakers, creameries and purveyors while also calling on his travels and experiences for culinary inspiration. Lahey graduated from Johnson & Wales University’s culinary arts program in 2001 and began his career as a line cook where he refined his technique and palate at acclaimed Chef Michael White’s Fiamma Osteria in New York City. Chef Lahey later worked with nationally recognized chef Hugh Acheson at Five & Ten in Athens, Georgia, and was also featured on the Food Network’s hit show “The Best Thing I Ever Ate,” for his fried black-eyed peas.
Ted’s Venison Sausage with Fennel and Golden Raisins:
Ingredients:
5 lb venison shoulder
1 lb pork fat
2 cups golden raisins
5 cl garlic; minced
3 TBS kosher salt
2 TBS fennel seed
1 TBS freshly ground black pepper
1 ts ground nutmeg
1 ts dried oregano
1/2 c dry red wine
medium pork casings
Method:
Grind the venison, raisins, and fat together in a food grinder with a 3/8 inch plate. Add garlic, salt, spices, and wine. Mix well with your hands. Shape into patties or stuff into casings with a sausage stuffer. Store for up to 5 days in the refrigerator
CHEF JORDAN WAKEFIELD: Owner and Executive Chef, 101 Concepts: Smoke Ring
Bio: Jordan Wakefield attended Le Cordon Bleu in Atlanta, where he took a coveted three month externship at the exclusive Homestead Resort in Hot Springs, Va. When Wakefield moved back to Atlanta, he began working as a lead line cook at the acclaimed Spice Market, under the tutelage of internationally heralded chefs Jean-Georges Vongerichten and Ian Winslade. The owners of 101 Concepts quickly recognized Jordan’s talent and hired him as sous chef of Meehan’s Public House Sandy Springs. Wakefield’s talent for combining Southern food and sensibilities to create cutting edge cuisine became highly praised, and he was soon promoted to executive chef of Meehan’s Public House in Downtown Atlanta. Most recently, he embarked on his latest venture with 101 Concepts: Smoke Ring, a Georgia-style barbeque house in Atlanta’s Castleberry Hill community.
Chef Jordan’s Venison Jerky Recipe:
Ingredients:
2 lb. venison top round, or leg of lamb, boneless
3 TBS red chili flake
3 TBS of chopped garlic
1 cup olive oil
1 cup soy sauce
1 cup worcestershire sauce
1 cup tupelo honey
4 TBS minced green onion
salt and pepper
2 TBS sriracha
3 TBS brown sugar
Method:
Slice the venison, AGAINST THE GRAIN, into ¼-inch thick slices. Set aside. Combine all the other ingredients, and whisk together about 5 minutes until combined. Cover the venison, and mix with covered gloved hands. Cover with plastic wrap and let sit over night.
The next day, set the pieces in a single layer in your dehydrator. Repeat the stacking of shelves until all your venison is layered out. Set the temperature on the 145 degree timer, and let the unit dehydrate for the next 6 hours, rotating the shelves every house to ensure even consistency.
Remove from racks, and let air dry for 1 hour. Enjoy!
The Union Sportsmen’s Alliance website is designed to provide valuable articles about hunting, fishing and conservation for members of AFL-CIO affiliated labor unions and all sportsmen and sportswomen who appreciate hunting and fishing and want to preserve our outdoor heritage for future generations. If you would like your own story and experience from the outdoors to be considered for our website, please email us at USAmembers@unionsportsmen.org.


