At the beginning of every hunting season, gun shops across the country receive frantic calls for help.
It goes something like this, “Old Betsy worked fine last year, but when I took her out yesterday (the day before season) she doesn’t work.” Of course, Betsy is a firearm, and if these same gun owners treated their automobiles like they do their guns, they’d be walking.
There are many reasons why Betsy, or whatever you call your favorite rifle or shotgun, stops working. The very act of firing a rifle or shotgun is a dirty business at least inside the firearm. Many of the firearms I see have years of build- up; powder residue and various weed seeds until finally it stops working.
This is most prevalent in semi-autos; rifles and shotguns suffer equally. Bolt action rifles or pump action shotguns don’t seem as prone to the same build-up, but it doesn’t hurt to get rid of any excess.
Well meaning hunters think they are doing their firearms a favor by spraying them down with WD-40 before putting them away for the season.
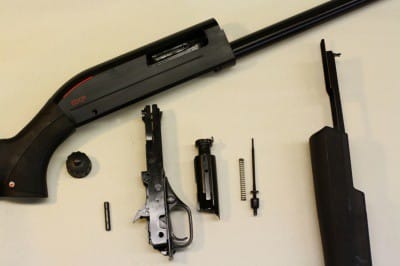
WD- 40 will, in fact, loosen the crud, but then as it sits, the crud gums up rendering moving parts useless. The only remedy is to disassemble and thoroughly remove all traces of WD-40.
If you like the idea of spraying the inside of your firearm use a product like Gun Scrubber specifically designed for the task. A word of caution: some aerosol products will remove painted camo finishes. So before spraying down the entire firearm, try it on a small spot that won’t be noticed.
The proper tools
Whether disassembling or just cleaning a firearm having the right tools handy makes the job easier.
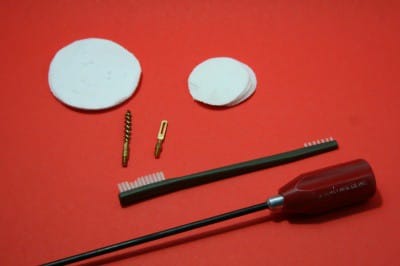
A cleaning kit complete with the proper size accessories like a jag and needle for patches, a coated rod to protect the crown of the rifle or a shotgun cleaning rod, and a preservative or gun oil will tackle most cleaning jobs.
The right size patches
Rifle cleaning patches are not designed as one size fits all. Patches are sized according to caliber and if a .30 caliber patch gets stuck in a .25 caliber bore it is nearly impossible to remove. Take it from me, if you stick an oversize patch. Stop! Do not attempt to remove it with a cleaning rod; instead take it to a gunsmith. I’ve seldom seen a happy ending in this scenario, and more often than not the customer ends up buying a new barrel.
Gun oil is meant to be used to keep parts operating smoothly not as a swimming pool inside of a firearm. A drop or two on friction points is usually enough. If you don’t know where to lubricate your firearm, go to the manufacturer’s website and download the operator’s manual. Proper maintenance procedures are often covered in these manuals.
More tools

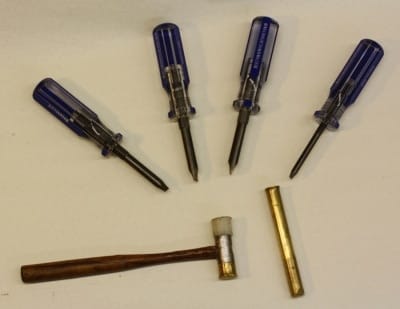
Nothing screams amateur gunsmith like a buggered screw on a firearm. To avoid this moniker use hollow ground screwdrivers that match the screw slot.
To remove and install pins use a brass punch and a plastic tipped hammer.
The takin’ apart is usually not the problem; instead it’s the puttin’ it back together that gives firearm owners fits.
Some models are more complex than others, but here are a couple tricks to keep things straight.
When disassembling your firearm, put the parts on your table or bench from left to right. The first part you remove should be on your immediate left, the next part beside it and so on. When reassembling, start on the far right and work toward you.
Not sure where it goes? A picture taken with a digital camera will remind you what part goes where.
Mounting scope, bases and rings
When mounting scope bases, dry fit the bases and screws then work the bolt. Many times the screws are different lengths and will cause interference of the bolt, if this is the case switching the screws will avert unforeseen trouble.
Many folks mount their own scope bases, rings and scope with no problem, but if your mentality is, “if a little drop of Loc-tite is good then a lot will keep it really tight.” You are in for trouble. You’ll discover the base screws to be tight as well as the bolt, firing pin, extractor and ejector; in one solid mass.

Again, the only recourse in this situation is a total disassemble to completely remove the Loc-tite from the moving parts.
When mounting scope bases and rings I seldom use Loc-tite, instead I place a drop of gun oil on the underside of the screw head. According to Leupold, this method when using Torx screws will allow the screw to get tighter and hold better than a drop of Loc-tite.
If you feel compelled to use Loc-tite, only use it on the base screws not the scope ring screws or windage screws. This will cause nothing but headaches when trying to remove them in the future.
Put a small drop of Loc-tite on a piece of wax paper and dip the tip of the threaded shank of the screw in the Loc-tite. It will spread over the entire length of the screw as it is tightened.
Treat her right
Remember to take Betsy out a week prior to season and give her a good once over, check for loose base screws and clean her to ensure she fires when asked to do so, but most of all treat her like a lady.


