Trail cameras have added to the success of deer hunting like unmanned drones have aided in the surveillance and destruction of America’s enemies abroad. Never before have hunters had such a real-world look at their quarry with preseason glimpses of antler growth and a detailed timeline of visits transmitted on every image.
Despite their obvious benefit, you can make trail cameras work even better for you. Each year my friends and I comment on bucks that seemingly sidestep and completely avoid being photographed. Occasionally you’ll snag one of these bucks on a trail camera or catch a quick glimpse of one to verify itsexistence, but for some reason they don’t become regulars on the trail camera docket. If you want to get few more of these ghosts on your SD card try employing a few of these trail camera tricks for photographic success.
REDUCE YOUR VISIT
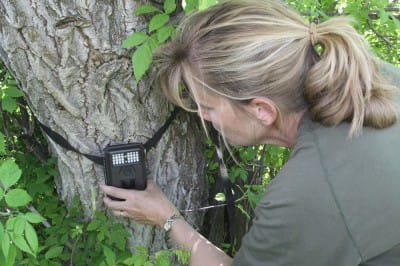
Your enthusiasm continues to educate more deer during preseason SD card-recovery trips than the presence of the camera alone. New camera owners and eager hunters visit their cameras regularly to check for new images, but the process can inform bucks of your intrusions and more importantly, the trails you prefer to use while entering and leaving a particular camera location.
To overcome this surveillance glitch consider limiting your trips to check for images. This takes willpower, but also some forethought in gear and memory collection. Cameras operate on various batteries so purchase the longest lasting models available. Lithium batteries offer additional power to extend use and decrease your visits. Lithiums cost more, but in the heat of summer when batteries don’t have to battle cold they can last for a month or more, especially if they are located in a shady location.
Match your long-lasting batteries with a memory card capable of holding thousands of images or hours of video. Most cameras today have an internal memory, but they accept SD cards with up to 16 GB of memory. Splurge and go for the most memory possible. Here are two tips. First, purchase double the amount of SD cards. That way you can simply pull the initial card and replace it with another. You don’t have to download on the spot, and to keep sites distinguishable put a numbered sign in the background that shows up on every image. Second, unless you’re creating a Spielberg-like documentary, forget video and just go with images. Video is cool, but eats up memory and gives you the same information, only with action.
MAP A ROUTE
Since you’ll likely have more than one camera out, map a route out to easily and efficiently move around your property to check cameras. Deer realize humans move about their environment. They quickly determine which highways, county roads, farm roads and field trails have the most activity, and at what times of the day. Use these established routes and any developed trails of your own to buzz in and out to check your cameras.
ATVs can aid in this process, especially if you create low impact trails to your camera sites. Deer often stand in the background and watch as an ATV or vehicle rumbles along a trail in a relative fast pace. Compare that to a human walking through the woods at a predator’s pace which puts them in escape mode. Put your cameras up in great deer locations, but quickly accessible to a vehicle wherever possible. Brush Hog-style mowers can widen trails for your ATV, plus create lanes of least resistance for deer to use in traveling. Schedule your trips and deer will soon consider you just another farmer or rural mail carrier going about a daily job on a pattern they can depend on.
MINERAL STATION
Not true for all locations, but most deer seek out natural mineral sites to supplement what they pick up while browsing. If you want to ensure the deer are getting maximum nutrition, provide minerals supplements and do it at a camera-friendly location. Deer quickly find minerals in their environment, but obtaining the required minerals and vitamins in the right amount is another story. Supplemental mineral sites put those right amounts in a location of your choosing.

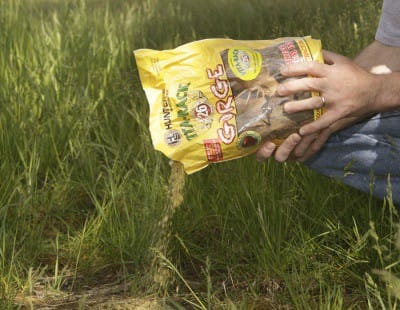
Today many companies manufacture supplements, but look for those with a calcium to phosphorous mix in a 2- to 1 calcium-to-phosphorous ratio for maximum antler development. Vitamins B and C also aid deer and balanced mineral mixes, such as Hunter’s Specialties Vita-Rack 26, help create a healthy immune system in deer to even ward off assaults from ticks. Put your minerals out early so deer get a boost after a long, hard winter and to help does recuperate prior to fawning.
BAIT A BUCK
Minerals offer a boost to nutrition, but as noted, sometimes deer find everything they need while foraging. If that’s the case and it’s legal to use bait, provide deer with a buffet they can’t ignore. Food plots can produce this buffet, but food plots often take time to mature and they provide deer with numerous entrance and exit locations giving deer unlimited possibilities to avoid your camera. A baited location, like a mineral station, puts deer in an exact location that a camera can’t miss. Deer have to put their nose in an x-marks-the-spot location for portrait-like snapshots.
Corn, oats, apples and a variety of natural baits can lure deer in for a camera opportunity. If you want a further appearance guarantee try a commercial product like Buck Natural. This hand pollinated strain of corn blended with various grains creates an attractant deer find hard to resist. Keep your site loaded up with a quality food product and you could photograph a buck throughout its antler development stages right up until hunting season. And if baiting is legal for hunting purposes, your efforts might end with a trophy beyond your photo collection.
WATER YOUR TARGET
Not true of all locations, but deer may require water and you can provide them with a daily dose via manmade water opportunities. A mature deer requires four to six quarts of water per day depending on seasonal temperatures and deer activity levels. During the summer deer oftentimes visit water before and after feeding. Whether they visit your food plot, a nearby agricultural field or vibrant browse, you may be able to lure them to your camera with water enticement.
You can create a water location with a simple water tank purchased at a local farm store, purchase a kid-sized swimming pool or even rent a skidsteer loader for a weekend, and dig out a depression. Line your depression with bentonite to seal the earth and rain water may keep your hole full. In other cases a spring, well or a portable water tank fill can keep the source brimming with wet attractant.
Water sources located adjacent to food plots, either in heavy cover or directly adjacent to the food, provide a direct drink for feeding deer. I know deer managers who have equal luck with water photography in open, food-plot settings and secluded ridge settings above food sources. Access for equipment and refilling opportunities will drive your location decision.
Trail cameras are ever changing, intriguing and amazingly helpful in targeting a trophy buck. Be careful though. Too much of a good thing can jeopardize your success. Use it sparingly and wisely for the best results this coming hunting season.
The Union Sportsmen’s Alliance website is designed to provide valuable articles about hunting, fishing and conservation for members of AFL-CIO affiliated labor unions and all sportsmen and sportswomen who appreciate hunting and fishing and want to preserve our outdoor heritage for future generations. If you would like your own story and experience from the outdoors to be considered for our website, please email us at[email protected].


