

How to Build and Use a DIY Paper Tuner for Bow Tuning: A Step-by-Step Guide
For hunters who want to improve accuracy and consistency, paper tuning is a must. It’s one of the most highly effective ways to fine-tune your bow. You’ve likely heard of it, but how many of us actually do it? If you’ve never tried it, paper tuning is a simple technique that helps you diagnose how your arrows are flying and identify any necessary adjustments. We’ll walk you through why paper tuning matters, how it works, and how to build your own affordable paper tuner at home.
Why Paper Tuning Is Critical for Hunters
When shooting a bow, the way your arrow leaves the bow and enters the target affects your grouping and precision, especially when shooting fixed blade broadheads. Even minor misalignments in your bow setup—such as rest position, nocking point, arrow spine, facial pressure, and overall form—can cause your arrows to veer left, right, high, or low. Paper tuning reveals these issues by showing the tear pattern created as an arrow passes through a sheet of paper. Reading the tear correctly will help you make the proper adjustments.
A clean, round “bullet hole” tear means your bow is tuned correctly, and your arrow is flying straight. Directional tears may indicate issues like incorrect arrow spine, misaligned rest position, or nocking point location issues. By analyzing these tears, you can make small adjustments to compensate and correct those tears.
How to Paper Tune a Bow
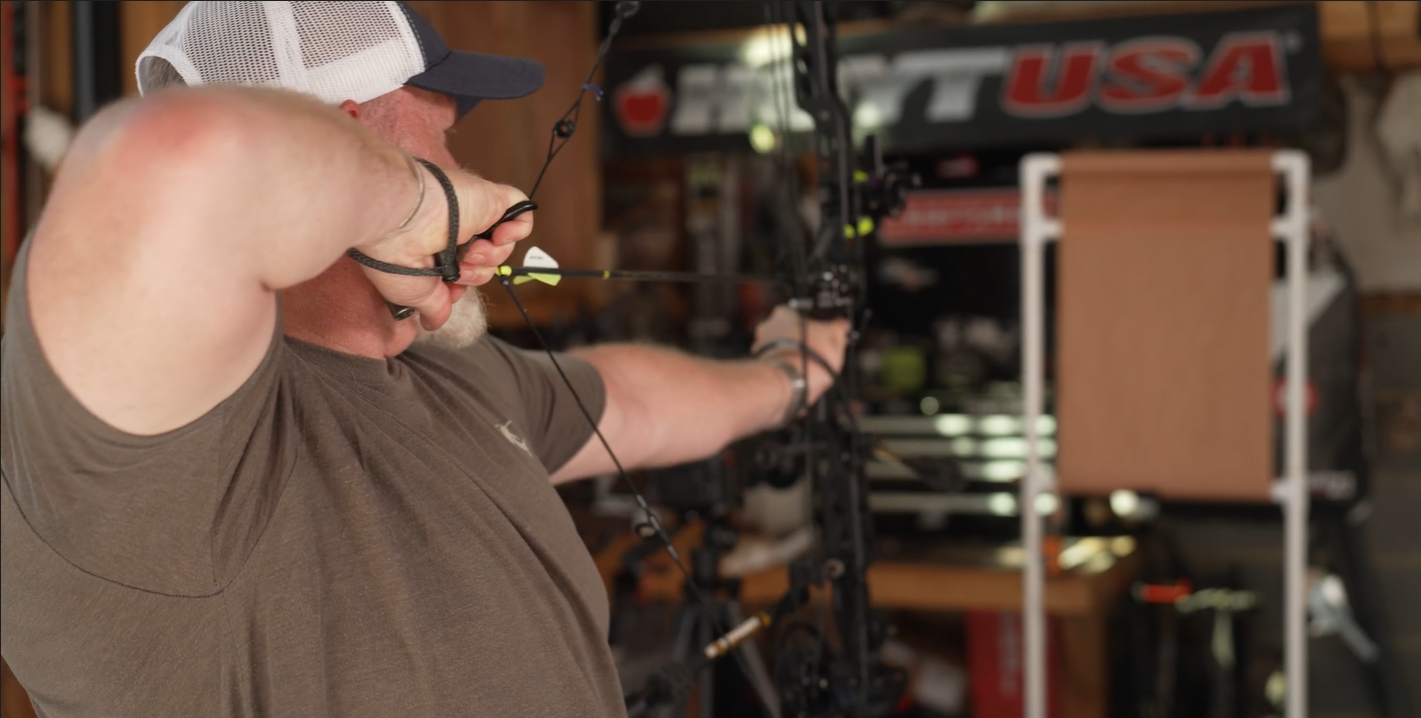
- Set up your paper tuner at a comfortable distance—usually around eight feet from the shooting line. The paper is stretched or rolled taut to provide a clean surface.
- With a proper backstop (like a bag target) set up behind your paper, shoot arrows directly through the paper. As the arrow penetrates, it creates a tear pattern. The shape and orientation of this tear provide clues to tuning issues.
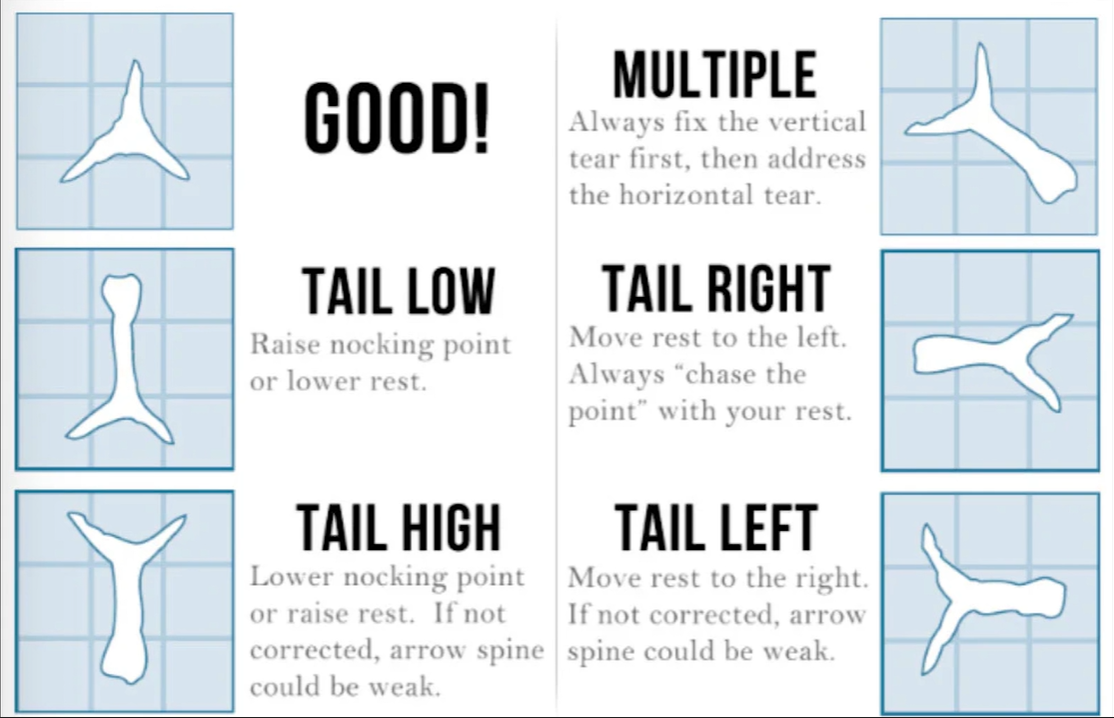
- Tear Pattern Key
-
- A bullet hole is ideal.
- If the hole tears to the right or left, it suggests your arrow rest needs adjustment. You’ll want to chase the point with your rest, meaning if your tail is hitting to the right of the point, move your rest slightly to the left. Small movements, often as little as 1/16th of an inch, can make a significant difference.
- If, after adjusting your rest, you still have left or right tears, it may indicate that you are applying too much or too little facial pressure when drawing back to your anchor point. It could also mean that an improper grip, such as one with too much torque, is being used.
- Tears angled up or down signify vertical alignment issues, which could mean you need to adjust your nocking point or adjust your rest up or down. A low tear or “tail low” in the diagram means you need to lower the rest. If this doesn’t work, then it could mean your arrow is too stiff, in which case you can increase the poundage of your bow by a couple of pounds or add point weight to achieve similar results.
- A high tear or “tail high” in the diagram might mean vanes are contacting the rest and pushing the arrow up. If that’s the case, raise your rest or lower your nocking point.
- Jagged or inconsistent tears may point to arrow spine or nock point problems.
- Repeat the process as needed, refining your setup until the arrows consistently produce clean bullet holes.
How to Build an Affordable Paper Tuner
Fortunately, constructing a paper tuner is straightforward and budget-friendly, with most materials available at local hardware stores like Lowe’s or Home Depot. The total cost is under $70.
Paper Tuner Materials List
- Saw and tape measure
- PVC glue (optional)
We are using ¾-inch PVC pipe and joints where noted, and ½-inch PVC pipe and joints where noted.
- (4) ¾-inch 90-degree elbows (base)
- (6) ¾-inch 3-way joints (2 used in base construction)
- (2) ½-inch, ¾-inch transition elbows (for paper roll holder)
- (2) 44-½-inch cut length ¾-inch pipe (main vertical sides)
- (6) 17-½-inch cut length ¾-inch pipe (base)
- (1) 17-1/2” cut length ½-inch pipe (paper roll holder)
- (4) 12-inch cut length ¾-inch pipe (vertical sides)
- (2) 3-½-inch cut length ¾-inch pipe (top vertical pieces)
Assembly Tips:

- Cut pipes to size and assemble the base frame without glue first to test fit.
- Glue all parts except one side of the top rails, allowing for easy paper roll changes.
- For compact storage, consider not gluing the base to the legs
- Use butcher paper rolls (50 feet recommended) that are stiff enough to tear cleanly.
Remember to shoot from your normal stance with consistent form, as torque and inconsistent shooting technique can affect tear patterns. Take your time and be patient.
Watch Complete Compound Bow Set Up & Tuning
Special thanks to the following sponsors for making this video possible:
International Association of Sheet Metal, Air, Rail and Transportation Workers (SMART)
International Brotherhood of Electrical Workers (IBEW)
National Electrical Contractors Association (NECA)
United Association/International Training Fund’s Veterans in Piping Program (VIP)
Ullico